How To Clean Sensors in RV Holding Tanks: A Full Guide

As full-time RVers, we quickly learned that RV life is not always all hikes, exploration, and great views. There are some dirty jobs to be done as well. Working, living, and traveling full time in our fifth wheel, we quickly had to adapt to the quirks that come with mobile giving. In this article, we break down how to clean the sensors in your RV holding tanks, how to keep your tanks free from build-up, and why it is essential to do so as a regular part of your RV maintenance routine.
Our goal is to share our knowledge and experiences of RVing with you so that you can spend more time exploring and less time dealing with some of the common issues that can plague RVers and make RVing feel stressful.
Understanding RV Holding tanks

Maintaining accurate and functional RV tank sensors is crucial for the best possible camping experience. These sensors provide vital information about the levels of liquid and waste in your gray, black, and freshwater tanks.
Before diving into how sensors work and how to clean and maintain them, let’s first lay the ground for what they look like in the context of RV holding tanks.
Black Tanks
The black tank is responsible for holding and storing the waste from your RV toilet. You can think of it like a septic tank. It is specifically designed to contain and manage human waste and toilet paper.
Black tanks are connected to the RV toilet through a dedicated plumbing system. When the toilet is flushed, the waste is fed from the bowl into the tank. The tank features an airtight seal to prevent odors from escaping and is vented to the exterior of the RV to allow for proper airflow.
These tanks are equipped with a sensor system that detects the level of waste inside, allowing RV owners to determine when it’s time for emptying. The sensor system within the tank measures the level of waste based on the electrical conductivity or capacitance of the liquid inside the tank. This information is then transmitted to the monitoring panel inside the RV, enabling you to monitor the tank’s capacity.
Gray Water Tanks
Gray water tanks, on the other hand, collect wastewater generated from sources such as sinks, showers, laundry machines, and dishwashers within the RV. This can include soapy water, food particles (although it is best to try to limit this), and other non-solid waste materials. Similar to the black tank, the gray tank is also fitted with sensors that (hopefully) provide an accurate reading of the wastewater level.
You don’t want gray water backing up into your shower or sinks!
Freshwater Tank
The Freshwater tank in an RV is responsible for storing and supplying clean, potable water for various onboard needs such as drinking, cooking, and showering. Fresh water tank sensors play a vital role in providing accurate information about the water level within the tank so you know how many gallons of water you currently have in your tank or can put into the tank.
The information from your sensors about each of your tanks is especially important when boondocking and when you do not have sewer connections.
Black Tanks vs. Gray Tanks
As they carry the biggest risk and are more likely to have inaccuracies, we will focus on black and gray tank sensors next.
Black tank sensors and gray tank sensors are similar in function, but there are some differences in their construction and operation due to the nature of the materials they monitor.
Here are the key differences between black tank sensors and gray tank sensors:
Sensing Mechanism: Both black and gray tank sensors use conductivity or capacitance to detect liquid levels. However, the sensor probes in black tanks may be designed to handle solid waste and toilet paper, which can create buildup or debris on the sensor surfaces. Gray tank sensors, dealing with liquid waste only, may have a simpler design without additional measures to handle solid waste accumulation.
Cleaning Considerations: Due to the presence of solid waste, black tank sensors may require more frequent and thorough cleaning compared to gray tank sensors. Solid waste residue or toilet paper can coat the sensor probes over time, leading to inaccurate readings or sensor malfunctions. Gray tank sensors, primarily dealing with liquid waste, may not accumulate debris as quickly and may require less intensive cleaning.
Understanding RV Tank Sensors

What are RV Tank Sensors?
RV tank sensors are electronic devices designed to measure and indicate the levels of wastewater (black and gray tanks) and freshwater in your RV. These sensors are typically located on the sides or bottom of the tanks and transmit data to a monitor panel inside the RV.
Types of RV Tank Sensors & How They Work
RV tank sensors typically use either conductivity or capacitance to detect the presence and level of liquids in the tanks.
Types of Sensors:
Conductivity Sensors: Conductivity sensors work by measuring the electrical conductivity of the liquid inside the tank. These sensors have probes that come into contact with the liquid, and the conductivity of the liquid determines the level reading. Conductivity sensors are generally reliable and can effectively detect the presence of liquids. However, they may be more susceptible to inaccuracies if there is solid waste or debris buildup on the sensor probes.
- Conductivity sensors in RVs are “through wall probes”, which can get physically gunked up and have the added potential for leaks. Generally, the fewer holes you can have in your RV, the better!
Capacitance Sensors: Capacitance sensors operate based on the change in capacitance between the sensor and the liquid in the tank. These sensors do not require physical contact with the liquid, as they work through the tank wall. Capacitance sensors are known for their accuracy and ability to measure both liquid and solid levels. They are less prone to false readings caused by debris or buildup on the sensor probes. Capacitance sensors can provide more reliable and consistent readings.
- The SeeLevel Tank Monitor system (capacitive sensor) in our fifth wheel is mounted on the outside of the tank, rather than on the inside. This can make readings a bit more accurate, although it can still throw inaccurate readings due to large amounts of build-up in the tanks.

How can you know if you are experiencing sensor issues?

You know it is important to be able to keep track of the levels of liquid in your holding tanks, but how exactly can you know if you are having a sensor problem?
Sensor issues in RV tanks can manifest in various ways.
Here are some common signs that indicate you may be experiencing problems with your tank sensors:
Inaccurate Readings: One of the most evident signs of sensor issues is consistently receiving inaccurate readings on your monitor panel. For example, the sensors may indicate that the tanks are empty or only partially full, despite knowing that they should be at a different level based on recently dumping your tanks or filling your water. This discrepancy between the actual tank contents and the displayed readings suggests a malfunctioning sensor.
Stuck or Frozen Readings: Another indicator of sensor problems is when the tank level readings remain stuck at a particular level, regardless of changes in water usage or tank emptying. The readings might freeze at “full,” “empty,” or any intermediate level and fail to reflect the true tank status.
Fluctuating or Inconsistent Readings: Sensor issues can also cause erratic or inconsistent readings. The monitor panel may display varying tank levels even when the water usage remains consistent or when the tanks have recently been emptied and refilled. These fluctuations can make it challenging to determine the actual level of water in the tanks.
Lack of Response: If the tank sensors are not providing read-outs at all, this clearly indicates a sensor malfunction. In this case, replacement may be necessary.
Common Causes of Tank Sensor Inaccuracies
Build-up of Waste and Residue
Over time, waste and residue can accumulate on the sensor probes, leading to false readings or complete sensor failure. Solid waste, toilet paper, grease, and other debris can create a coating that interferes with the sensors’ ability to accurately detect the liquid level.
Sensor Calibration Issues
Misalignment or calibration problems can cause incorrect readings. Improper installation, vibrations during travel, or general wear and tear can lead to misaligned or poorly calibrated sensors.
How to Clean Your RV Tanks & Sensors

Knowing how to properly clean sensors in your RV or remove buildup from holding tanks is one of the important lessons of RV ownership. Dirty sensors can lead to big (and smelly) problems that are extremely unpleasant. Maintenance is not the most fun part of RVing, but being proactive is completely worth it when it comes to your holding tanks.
Tank Cleaner Solutions:
There are commercial tank cleaner solutions available, including enzymatic options, that help break down any solid waste while also eliminating odors.
A couple of popular RV tank cleaning solutions include:
- Happy Camper Tank Cleaner: A step up from their typical holding tank treatment, aimed at a deeper clean and restoring poorly working sensors
- Unique Camping & Marine RV Digest-It: Can be used as tank treatment, but also has special instructions for unclogging holding tanks. They also have a deep cleaning solution made specifically for black tank cleaning.
|

|
|
Primary Rating:
3.5
|
Primary Rating:
3.5
|
|
$55.45
|
$19.99
|
Be sure to follow the instructions provided by the manufacturer to effectively clean your tanks and sensors!
The GEO Method:
The GEO Method is one popular homegrown option for deep cleaning RV tanks. It involves using a mixture of water softener (like Calgon), laundry detergent or dish soap, and water softener to break down waste and residue, keeping the tanks and sensors clean.
There are several variations of the GEO method that RVers use. Here is an example:
- 1 cup Calgon water softener
- 1 cup liquid laundry detergent
- 1/2 cup Dawn dish soap
- Plenty of water (many RVers recommend 3-4 bowls full of and then towing, if possible, to let the solution mix around and coat the tanks)
While this method can help with flushing out the tank and preventing future build-up by coating the tank, it may not be the most effective method for odor control or breaking down solid waste. It is also a water-heavy method, which is not ideal if you are dry camping or boondocking.
Using Dishwashing Detergent:
Another simple and affordable option is to just use dishwasher detergent. Add a small amount of detergent designed for dishwashers to each tank, fill them with water (about halfway), and let the solution sit overnight, or better yet, get on the road! Then, thoroughly empty or flush the tanks to remove any loosened waste and residue.
Tank Cleaning Wand
A tank cleaning wand, which attaches to a hose, can help reach and spray internal sensors directly. Typically used for black tanks, you insert the wand down the toilet and into the black tank and maneuver it around to dislodge any debris or buildup in the tank or sensor probes.

34" flexible section and rotary cleaning action to help blast away residue in hard to reach tanks
Professional Deep Cleaning
If your tank sensors are heavily clogged or you prefer professional assistance, you can purchase a professional deep cleaning. These businesses have the expertise and equipment to clean RV holding tanks thoroughly, helping to ensure optimal sensor performance.
- Mobile Dump Station and RV Tank Specialist are two examples of businesses that offer this type of service
Use Ice Cubes
Using ice cubes to clean RV tank sensors is another common method that can help remove debris and buildup from the sensor probes. Here’s how it works:
Preparation: Start by ensuring that your tanks are empty or have minimal liquid in them. This will allow the ice cubes to make direct contact with the sensor probes.
Ice Cubes: Drop a few ice cubes into each tank (black, gray, and freshwater). As you drive or move your RV, the ice cubes will bounce around inside the tanks, agitating and scrubbing the sensor probes.
Agitation and Cleaning: The movement of the ice cubes helps dislodge any solid waste, debris, or residue that may have accumulated on the sensor probes. This process can help restore proper sensor functionality and accuracy.
Flushing the Tanks: After a period of driving or movement, flush out the tanks thoroughly. Empty the tanks, ensuring that all the ice cubes and dislodged debris are removed.
While using ice cubes can be a helpful maintenance method, it may not solve severe or persistent sensor issues caused by more significant buildup or other factors. If you continue to experience sensor inaccuracies or other problems, it may be necessary to perform a more thorough cleaning or consider professional assistance or sensor replacement.
For a more in-depth look at RV maintenance check out our RV Maintenance Checklist!
Tips for Keeping Your Tanks Clean and Functioning Well

Consistent Tank Treatment
Using RV-specific holding tank treatments helps break down waste, control odors, and prevent the formation of solids. These treatments often contain enzymes and bacteria that naturally break down waste, promoting the longevity of your tanks and sensors.
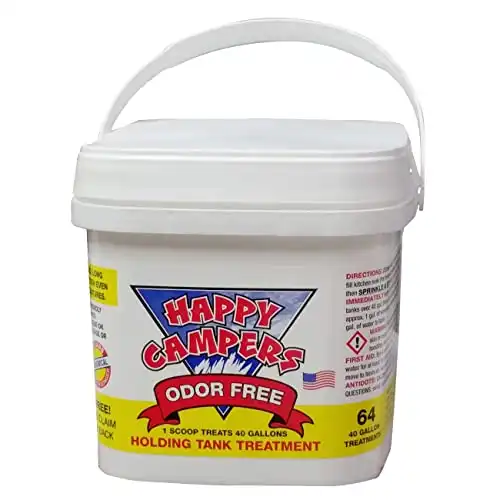
We have tried a few different brands and our favorite is Happy Campers. It is environmentally friendly, works quickly, we have never had any build-up or backups since using it, and it does not give off strong odors like other tank treatment products.
We have also used this in our tank after emptying on a tow day, to help break down anything that might have been left behind in the tank while we drive to our next destination. Works like a charm if you have access to additional water!
Tank Flushing
Regularly flushing your tanks with clean water after each use helps remove residue and waste, reducing the chances of sensor inaccuracies. If your RV has it, using the built-in tank flushing system can ensure a thorough clean each time you dump your tanks.
This works by backfilling the gray and black tanks with water from the outside with increased pressure, which is then emptied back out again. A sort of rinse-and-repeat method!
Use Lots of Water
When using your RV’s toilet, it’s important to use plenty of water to avoid the dreaded “poop pyramid” or solid waste buildup. Being sure to use enough water helps flush waste through the system, preventing clogs and reducing the likelihood of sensor inaccuracies.
If you are a boondocker, this might sound like it will be tough to adhere to. We recommend using a separate water bladder to bring additional fresh water into your tank rather than trying to skimp on water usage when going to the bathroom. This will be much less of a hassle than dealing with a clogged black tank, unpleasant odors, or problematic sensors.
If you really want to be frugal, you can also consider collecting your water when washing hands or doing dishes and pouring that into the toilet when using the bathroom, rather than letting it go into your gray tank. This saves on gray tank space (which can fill up quickly and limits water usage in the toilet, while also working to keep things clean and working as expected).
Keep Black Tank Closed When Connected To Sewer
It may be tempting to leave your black tank valve open and draining through your sewer hose when on full hookups, but this can lead to problems as liquid drains out and solid waste is left behind. To keep things in good working order, the best option is to keep the valve closed and use tank treatment as normal, only dumping the tank as it becomes full.
The pressure of the built-up waste will allow it to clear out more effectively. With this, ensure you also have enough gray water built up to flush out afterward, to keep things flowing and catch anything in your sewer hose that may have been left behind.

How to Gauge Tank Fullness When Sensors Are Not Working
In the absence of functioning tank sensors, there are several indicators you can look for to gauge the fullness of your tanks to help with preventing any catastrophes:
Signs Your Tanks Are Getting Full:
Visual Inspection: Check the tanks visually by opening the appropriate access panels and observing the tank levels directly. This method requires familiarity with your RV’s tank layout and may not be an option in some RVs.
- This is not possible with our RV, although you can look down into the toilet to the black tank and start to see once it gets more full. Not our favorite method!
Time-Based Estimation: Determine an estimated timeline for emptying your tanks based on your average water usage and the number of people using the RV. Keep track of your water consumption to estimate when the tanks might be reaching capacity.
- We know our 50-gallon black tank can comfortably last us 2 weeks for the 2 of us. This does not take us to completely full, but gets us to a level where we want to empty. Many RVers choose to empty their black tank when it is about 75% full (which can cut down on odor potential). Our gray tank can last us longer when boondocking due to careful water usage but can fill up in a matter of days if we are not careful.
Sound and Suction: As tanks fill up, you may notice slower drainage or gurgling sounds when emptying sinks or flushing toilets. These can be indications that your tanks are nearing full capacity.
Odor Detection: An unpleasant odor coming from your sinks, showers, or toilets could be a sign that your tanks are reaching their limits.
What can happen if RV tanks overflow?
You might be thinking, what is the worst that happens if my sensors are inaccurate and my tanks get too full?
All of that built-up liquid and waste has to go somewhere, and unfortunately that somewhere tends to be back into your RV (think shower drains, sinks, and an overflowing toilet).
In case you need a bit more motivation to keep your sensors clean and pay close attention to the levels in your gray and blank tanks, the following is a quick rundown of what you could find yourself up against if your tanks do in fact become too full:
Contamination and Health Risks: Overflowing black tanks can result in the release of raw sewage and waste materials, posing a significant health hazard (bacteria, viruses, etc.). Gray tank overflow may also contain soapy water and food particles, which can contribute to unsanitary conditions and attract pests.
Odor Issues: As you might expect, overflows result in foul odors permeating both the interior and exterior of the RV. These smells can be really difficult to eliminate and can smell bad even if you have been treating your black and gray tanks for odor prior to the overflow. No one wants to spend their camping getaways cleaning up overflowed waste tanks!
Damage to RV Components: Overflowing tanks can cause damage to the RV’s plumbing system, sensors, and other components. Excessive pressure from overflowing tanks can lead to leaks, cracks, or ruptures in the tanks or pipes, resulting in costly repairs and the need for replacement parts. In addition, RVs are not meant to get wet. Overflows can contribute to mold, mildew, and rot.
This is not to scare you or make you feel bad if an incident does occur. RVing is an adventure and these things happen. We just want you to be empowered to do what you can based on what is within your control and set yourself up for success as much as possible!
Conclusion

Keeping your RV’s tank sensors clean and in working order is essential for a hassle-free camping experience and should be part of your regular maintenance schedule.
Methods like the GEO Method, dishwashing detergent, specially formulated tank cleaner solutions, and tank cleaning wands, can help maintain accurate sensor readings. Additionally, implementing good practices such as tank flushing, consistently using holding tank treatment, and using plenty of water will keep your tanks clean and functioning optimally.
In cases where sensors are not working, it is helpful to familiarize yourself with alternative methods to gauge tank fullness. Over time we have grown accustomed to knowing what level our tanks are actually at when it throws one of its “typical errors, as well as understanding our typical tank usage to help us stay on top of things.
By following these guidelines, you can ensure the longevity and reliability of your RV tank sensors, and stay ahead of any really dirty jobs. RVing doesn’t have to be smelly or gross; simple maintenance can help you spend less time stressing about your tanks and more time enjoying the great outdoors!
RV Tank Essentials
Here are a few of the essentials we have as part of our RVing setup that helps us keep our tanks clear and sensors working properly:
- Sewer hose kit (to dump out your tanks)
- Happy Campers RV Tank Treatment
- RV Digest-It Holding Tank Treatment
- Water hose for back flushing tanks (we recommend this to be a separate hose from the one you use for your freshwater tank)
- Water bladder for access to more water when dry camping or boondocking without water hookups
- You can also consider a Swivel Stik if you have the space (we borrow this tool this when staying with family)
- If you sense you have a more serious problem, consider purchasing a deep cleaning solution or getting a professional cleaning.
You can explore a complete list of our RV camping essentials, RV must-haves, and our favorite RV gadgets to help you round out your RV setup so you can spend less time dealing with mishaps and spend more time adventuring!
RVing can be bumpy and our transition to full-time RV life was no walk in the park, but we hope our experience helps you set yourself up for success! Enjoy the journey. We can’t wait to hear where it takes you!


![The Best Lithium Battery for RVs [A Guide For RVers by RVers]](https://www.fulfillingtravel.com/wp-content/uploads/2024/01/best-lithium-battery-for-rv-768x576.jpg)

